![]() This section is valid for all product flavors.
This section is valid for all product flavors.
To change the display style for a layer on the map:
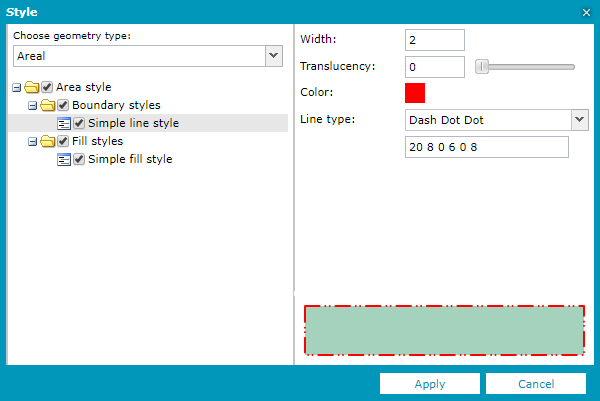
![]() The Line type parameter can be set in Geospatial Portal in version 16.00.0400 or newer. For WMS and WMPS dashed line style is only available for services provided by GeoMedia WebMap in version 16.00.0400 or newer or by any third-party services that supports dashed line style.
The Line type parameter can be set in Geospatial Portal in version 16.00.0400 or newer. For WMS and WMPS dashed line style is only available for services provided by GeoMedia WebMap in version 16.00.0400 or newer or by any third-party services that supports dashed line style.
![]() Dashed style for vector features (WFS, PSS) may be simplified on printouts when internal Internet Explorer printing engine is used. This is due to Internet Explorer browser limitation. For more information on printing configuration in Geospatial Portal see Configuring Printing Feature topic in Geospatial Portal Administrator Guide or contact with your Portal administrator.
Dashed style for vector features (WFS, PSS) may be simplified on printouts when internal Internet Explorer printing engine is used. This is due to Internet Explorer browser limitation. For more information on printing configuration in Geospatial Portal see Configuring Printing Feature topic in Geospatial Portal Administrator Guide or contact with your Portal administrator.
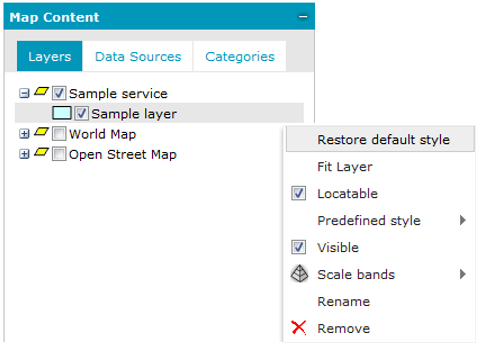
![]() To restore the default style for the selected layer, right click on the entry for the layer in Map Content and select Restore default style.
To restore the default style for the selected layer, right click on the entry for the layer in Map Content and select Restore default style.
![]() The functionality for changing the style for displayed layers is accessible only for layers that come from services which support style changing.
The functionality for changing the style for displayed layers is accessible only for layers that come from services which support style changing.
Defining a pattern fill:
For geometries of the area type, you can define a pattern fill apart from the simple fill style. To define a pattern, fill in the Style dialog box, select the Simple fill style, and then type the path to the images library in the Library address field. The images library address should contain the URL to the virtual directory containing the images or to the folder name with images in the application folder that has been defined by the administrator.
In the Picture field, all pictures for the provided libraries are visible. Select a picture that should be used as a pattern fill, and then click Apply to set the pattern fill for all objects of the selected feature class. Translucency for the pattern fill can be defined as well as for the simple fill style. When the pattern fill is defined, the color attribute is not applied.

![]() A pattern fill can be applied only to layers from services such as Web Feature Service, WebMap Map Publisher Service, and Personal Storage Service.
A pattern fill can be applied only to layers from services such as Web Feature Service, WebMap Map Publisher Service, and Personal Storage Service.
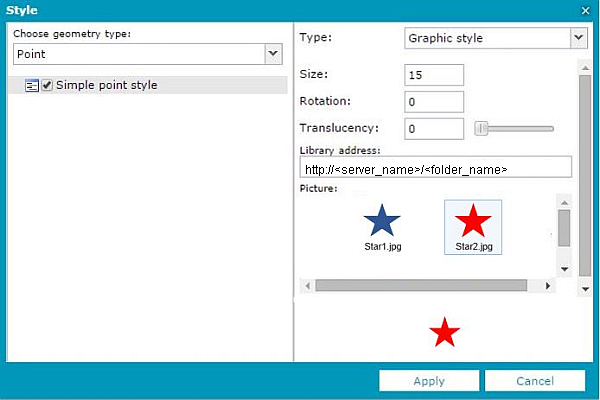
Setting image as a point style:
For features with the point geometry type, you can define a simple point style and graphic style.
To define the graphic style for points: