![]() This section is valid for all product flavors.
This section is valid for all product flavors.
To add a new data source:
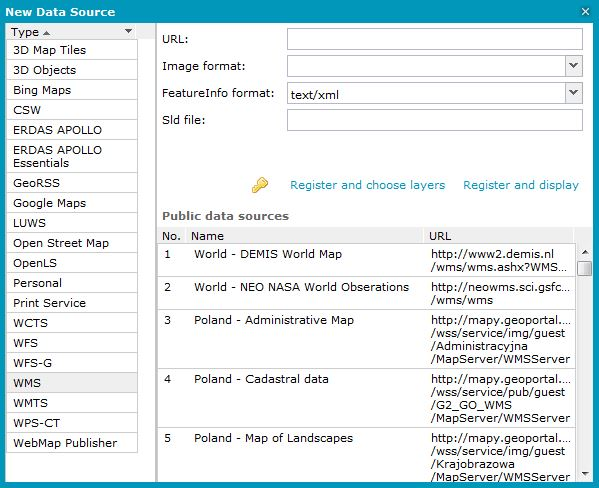
A New Data Source window opens, and a list with connectors to the services displays on the left side of New Data Source.
Your administrator can prepare a list of services and links to the services available to you. To connect to the service from the list, select the service. All required fields specifying the connection parameters will be populated automatically.
![]() There is no requirement to add the 'http://' prefix at the beginning of the URL. If you forget to add 'http://' at the beginning of the URL, Geospatial Portal will add it automatically.
There is no requirement to add the 'http://' prefix at the beginning of the URL. If you forget to add 'http://' at the beginning of the URL, Geospatial Portal will add it automatically.
![]() The appearance and functionality of the fields in the New Data Source dialog box may vary depending on the selected connector.
The appearance and functionality of the fields in the New Data Source dialog box may vary depending on the selected connector.
Registering services such as WMS results in automatic data (layers) display in the map window.
Use the Display maps or Displays map or queries commands to display, in the map window, data from other types of services (data sources).