![]() Create new is a default option. If no queries were performed, only the Create new value is available.
Create new is a default option. If no queries were performed, only the Create new value is available.
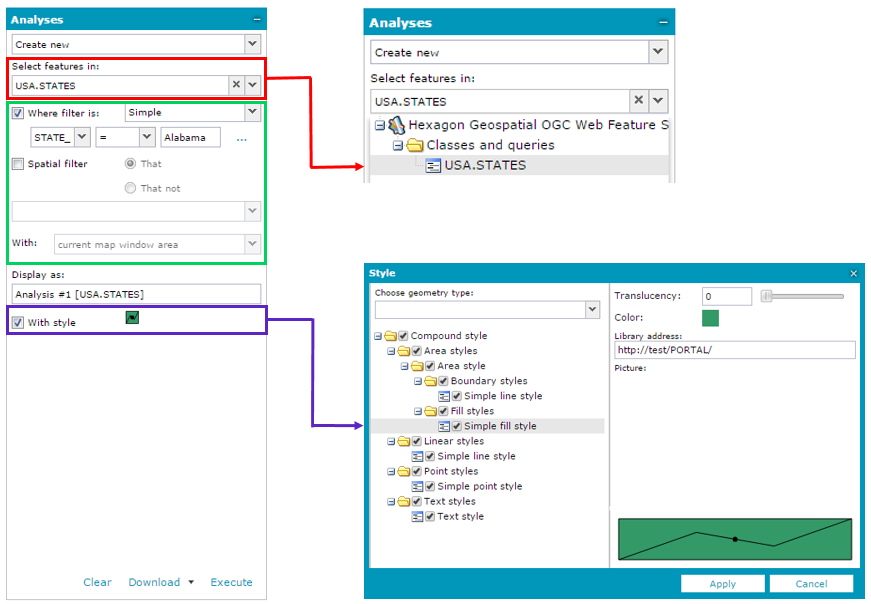
- Check Where filter is to perform an attribute query and to set the required parameters.
- Check Spatial filter to perform a spatial query and to set all the required parameters.
![]() Available spatial and attribute parameters and operators may vary depending on the data source type. The features can be filtered spatially with current map window, drawn geometry and selected features using available operators (for example intersects, overlaps, touches, contains, disjoint, crosses etc.).
Available spatial and attribute parameters and operators may vary depending on the data source type. The features can be filtered spatially with current map window, drawn geometry and selected features using available operators (for example intersects, overlaps, touches, contains, disjoint, crosses etc.).
Data appears in the map window and in the Map Content tab. Response time depends on the quantity of data that is loaded.